Birake is the official cryptocurrency exchange of the Decenomy ecosystem. From creating an account to KYC onboarding, this guide walks you through all you need to know about using Birake. Let’s dive right in…
What is Birake?
Originally launched in December 2018, Birake kicked off operations as a whitelabel cryptocurrency exchange project. Simply put, other companies could use Birake’s platform and market it as their own. The goal was to provide website owners and users of the Birake exchange network with a large database of orders, thus enhancing liquidity and trading volume.
In addition to its white labeling service, Birake has a robust cryptocurrency exchange platform. However, due to growing regulatory concerns across the globe, users must register and verify their accounts before they can use the platform.
How to Open an Account on Birake
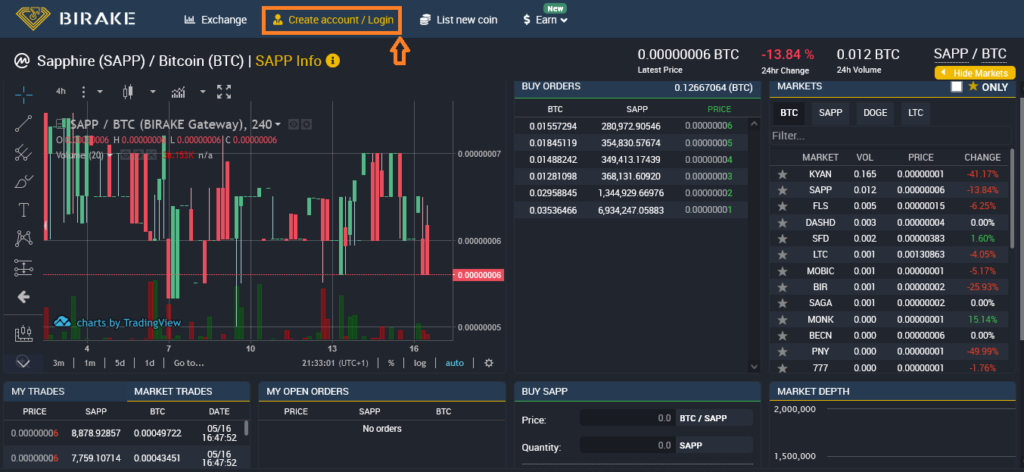
Step 1: Click on the “Create Account/Login” tab. You will be directed to a page where you’ll need to enter your account name and email. A password will be automatically generated for you. It is important that you save this password as it cannot be recovered, and losing it will mean losing your account.
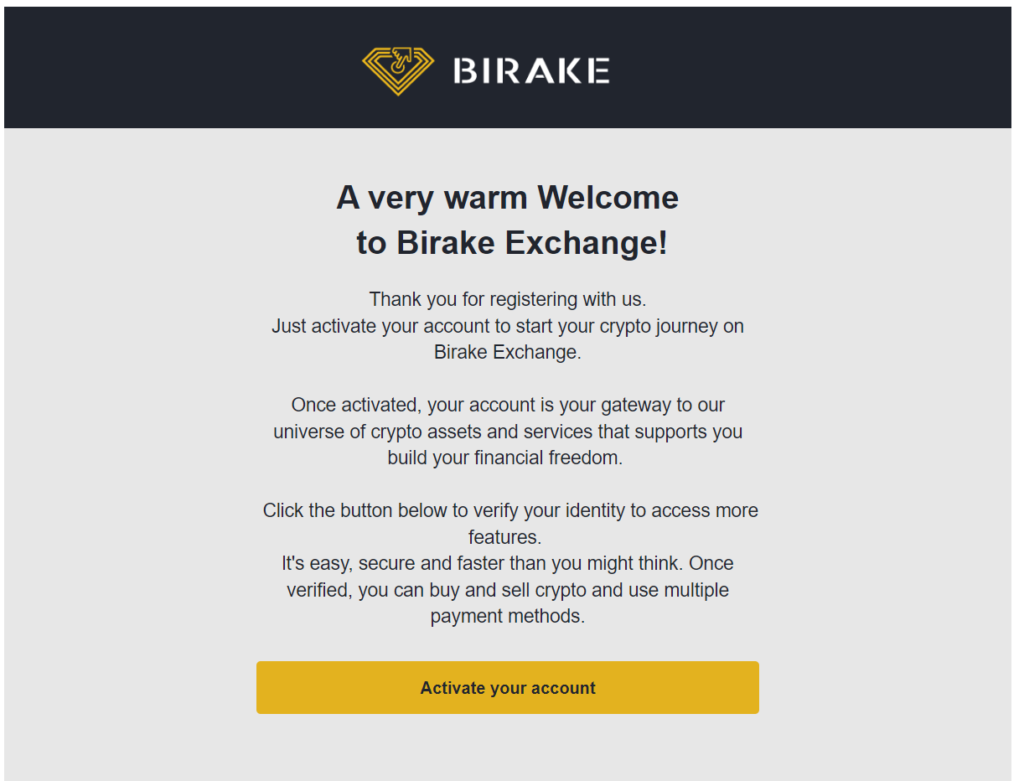
Step 2: You’ll receive a confirmatory email. Click on “Activate your account” to complete the initial registration.
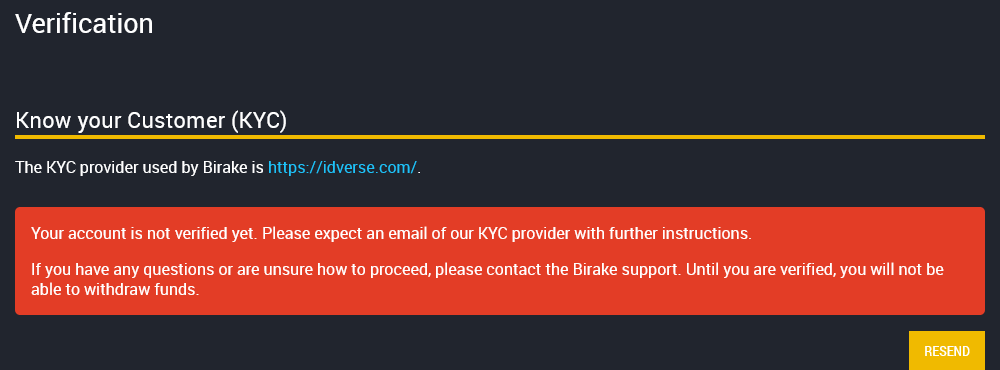
Step 3: Due to regulatory checks, only verified accounts can withdraw funds from Birake. As a rule of thumb, ensure that you’ve scaled through your KYC checks before making any deposit to the exchange.
How to Verify Your Birake Account
As already mentioned, KYC is needed for withdrawals on Birake. This is due to the EU AMLD5 Directive, which requires users to submit verification of their identity on crypto exchange platforms. In 2023, Birake employed the services of IDVerse, a customer identity verification and anti-fraud solutions provider, for KYC onboarding.
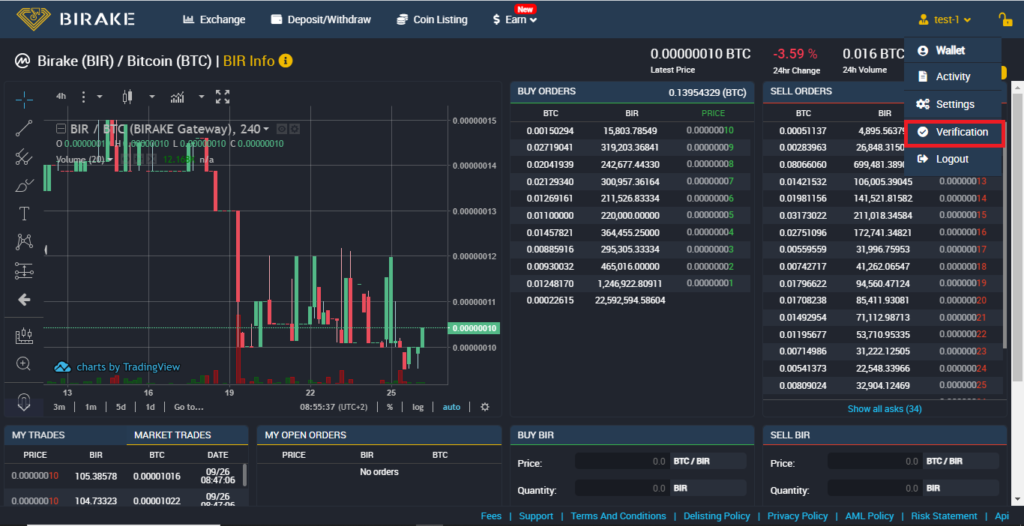
To verify your account, navigate to the “Verification” option from your profile at the top right corner of the website. Proceed to click on the “Send” button. You’ll receive an email from IDVerse to begin the KYC process. The verification process requires a smartphone.
Depending on your country, there’s an average of about four accepted ID documents, including a driver’s license, passport, ID card, and photo card. Take a picture of the document and wait for the platform to verify your identity.
Be sure to check Decennomy’s official documentation for more details on how to verify your account. You can confidently start to use the Birake exchange after your identity has been verified.
How to Deposit on Birake
Birake supports crypto deposits in up to 30 different digital assets, including popular ones like Bitcoin, Litecoin, and Doge.
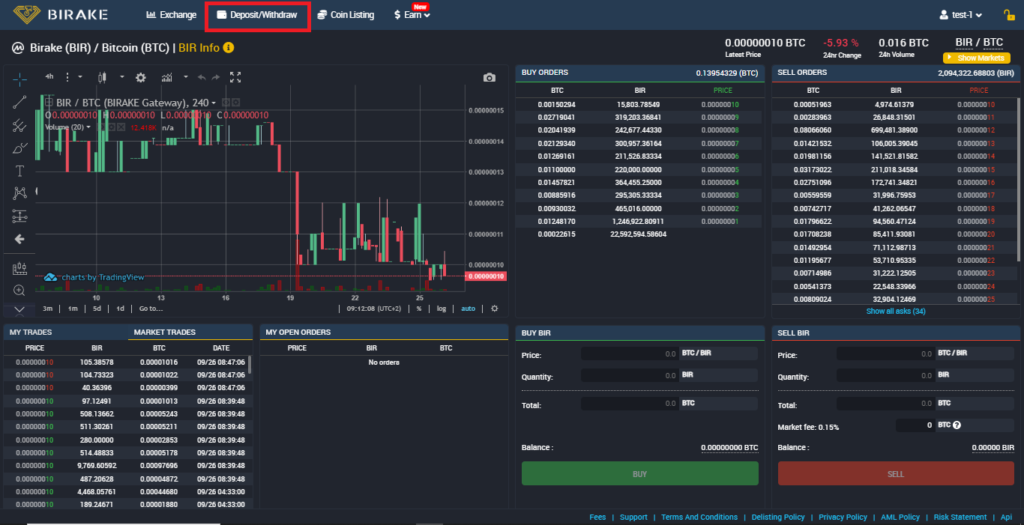
The platform recently enabled fiat-on-ramp. Although the feature is still in beta implementation, users will be able to directly purchase a cryptocurrency via bank transfers or through debit and credit card payments directly on the exchange.
However, once a deposit has been made, you can start trading immediately after it is confirmed. This can take anywhere from a few minutes to hours, depending on the state of the blockchain network.
How to Trade on Birake Exchange
Looking at the Birake trading interface can come off as daunting if you are new to cryptocurrency trading. But upon closer inspection, the platform offers robust trading features for both newbies and more experienced traders.

As a rule of thumb, start by familiarizing yourself with the different sections, such as the order book, price charts, and trade history. There are four trading pairs on the exchange: BTC, LTC, DOGE, and SAPP.
To place an order, you’ll need to select the cryptocurrency pair you want to trade (e.g., BTC/SAPP, SAPP/FLS). Birake does not distinguish between the various order types, like market orders and limit orders. For clarity, market orders are executed immediately at the current market price, while limit orders allow you to set a specific price for buying or selling. However, you will have to manually input your desired selling or buying price.


